
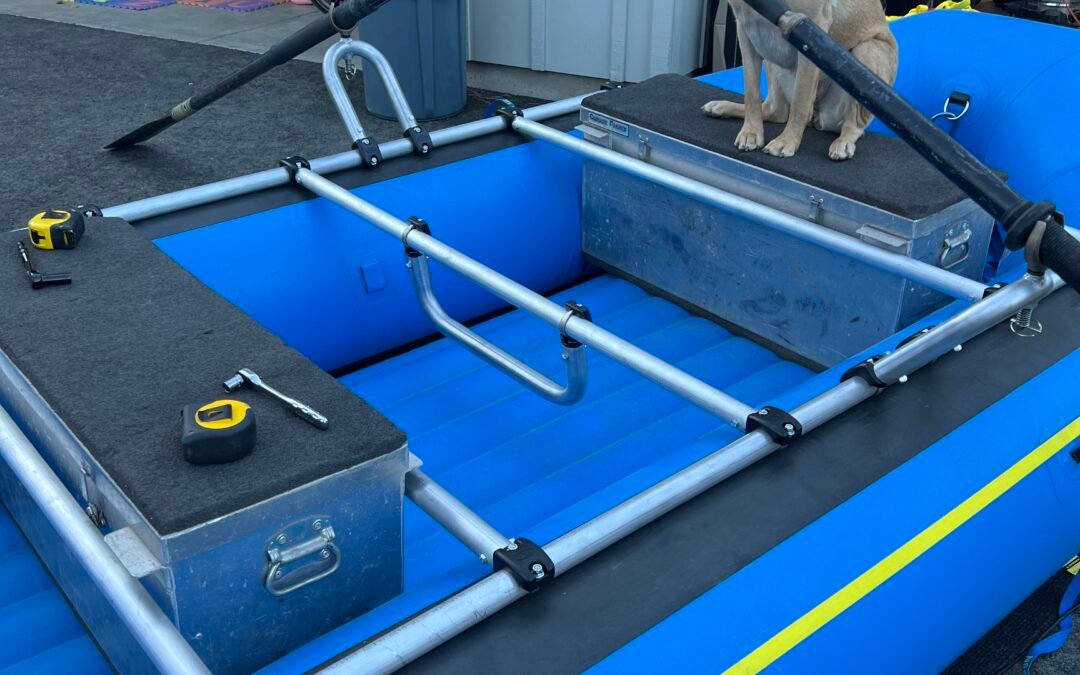
This guide will walk you through the steps to build a custom, cost-effective adjustable DIY raft frame designed for a 14ft NRS Otter. The key feature of this frame is the use of SRC raft frame connectors, which provide superior functionality and adjustability.
Tools and Materials Needed
- SRC Raft Frame Kit: Includes SRC connectors and oar towers.
- 1 1/4″ 6061 Aluminum Pipe: The required diameter for SRC connectors.
- Custom Foot Bar (optional): Ordered to fit the specifics of your raft.
- Drill Press: Recommended for precision.
- Deburring Tool: For smoothing pipe edges.
- Measuring Tape and Marker: For accurate measurement and marking.
- Safety Equipment: Gloves, goggles, and ear protection.
Preparation
- Planning: Review the CAD drawings provided with your SRC raft frame kit to familiarize yourself with the pipe dimensions and connector placements for your frame style.
- Material Sourcing: Purchase 1 1/4″ 6061 aluminum pipe from your local metal supplier. Use the cut list from the CAD drawings availble on DIYRaftFrames.come to have your local metal supplier pre-cut the pipes or buy the pipe in full lengths and cut them yourself using appropriate tools

Building the Raft Frame
Step 1: Deburring And Clean The Aluminum Pipe
- Begin by deburring and cleaning the cut aluminum pipes to remove any sharp edges, ensuring a safe and smooth surface for assembly. A simple metal file works great for this


Step 2: Layout your frame
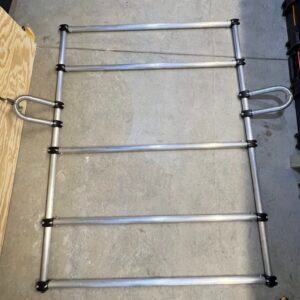
- Lay out all your materials and tools. Arrange the aluminum pipes according to the frame design outlined in your plans.
Step 3: Drilling your pipe and frame connectors
- Place a SRC connector in either end of your frame cross member. Make sure you lay them out on a flat surface with the SRC logo facing down to align both connectors in the pipe. Secure each connector to the pipe with tape and mark the drilling spots as per the CAD drawings.
- Using a drill press, carefully drill the holes where the SRC connectors will attach to the pipes. Ensure each hole is clean and precisely aligned. If possible setup a jig to make this is an easy rinse and repeat process for each connector.
- Install the provided bolt and locking nut through the pipe and SRC connector.
- Repeat the process for each connector.


Step 4: Assembly
- Connect your corssmembers to your side rails using the provided U-bolts.
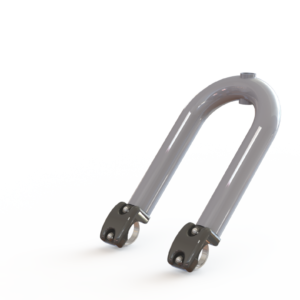
- Attach the oar towers at your desired points along the side rails.
- If you have one, fit your custom foot bar to crossmember just in front of your oar towers.


Step 5: Final Adjustments
- Once all components are assembled, make any necessary adjustments to ensure the frame fits perfectly on your raft and that all your accessories fit each bay of your frame.


Finishing Touches
- Review all connections and tighten any loose bolts.
- Test the frame for stability and fit by placing it on your raft and simulating oar placement.
- Make final adjustments as necessary to ensure optimal performance and safety.
Maintenance and Care for your aluminum raft frame
- Regularly check all connections for tightness and signs of wear.