

Hey boater, are you thinking about building a DIY Raft Frame? I wrote this guide to help get you started. I was in your same shoes, looking for an affordable, customizable option for my new raft. Building your own DIY raft frame is a great option for any boater looking for a custom feature, bragging rights, or hoping to save hundreds of dollars. This guide will walk you through the essential steps of planning and constructing a durable and functional DIY raft frame.
Understanding DIY Raft Frame Dimensions
Importance of Knowing Your Boat’s Dimensions
Before diving into the construction of your raft frame, you need to start with your raft’s dimensions. These measurements dictate the size and shape of the frame you need to build. Start by consulting your boat manufacturer’s recommendations for frame sizing; most will list a recommended frame width and max length.
Tips on Obtaining These Measurements
To obtain precise dimensions, use a flexible tape measure to gauge the length and width of your raft’s inner space where the frame will sit. Note any curvature or unique design features that may influence the frame design. Additionally, consider the height at which you want the frame to sit, as this affects the center of gravity and stability of the raft.
Choosing the Right Material for your DIY Raft Frame
Selecting the appropriate material for your raft frame is an important choice. It will determine its durability, weight, and ease of maintenance. The most common materials used are wood, aluminum, and steel, each offering distinct advantages and limitations.
Overview of Material Options
- Wood: Ideal for those seeking a cost-effective option and who have basic carpentry skills. Wood is versatile but requires regular maintenance to prevent rot and water damage.
- Aluminum: Known for its strength and lightweight properties, aluminum is the industry standard for raft frames. It is light, strong, and resistant to corrosion, making it a durable choice for water exposure.
- Steel: Extremely strong and capable of withstanding significant stress. However, steel is prone to corrosion if not properly maintained and is generally heavier than aluminum.
Pros and Cons of Each Material
- Wood:
- Pros: Low cost, easy to work with using basic tools.
- Cons: Heavy, requires frequent maintenance to prevent degradation.
- Aluminum:
- Pros: Lightweight, strong, and relatively easy to source through metal suppliers.
- Cons: More expensive than wood, can be difficult to work with without specific tools.
- Steel:
- Pros: High strength, ideal for demanding conditions.
- Cons: Heavy, requires extensive maintenance to prevent rust, and is less portable.

Detailed Look at Raft Frame Materials
Wood: Characteristics and Maintenance
Wood is an accessible material for those familiar with basic carpentry. It allows for easy customization and repairs, which can be advantageous for DIY projects. However, wood is susceptible to water damage and requires consistent maintenance like sealing and varnishing to ensure longevity. Ideal wood types for raft frames include cedar and redwood, which offer natural resistance to rot and decay.
Aluminum: Benefits and Sourcing
Aluminum is the preferred choice for many due to its durability and lightweight nature, making it easier to handle and less burdensome for the raft. When sourcing aluminum, look for 6061-T6 aluminum, known for its superior strength and corrosion resistance. Local metal suppliers or specialty outdoor retailers are good sources for this material. Ensure the aluminum is properly treated to withstand the elements, particularly if your rafting involves saltwater exposure.
To learn more about sourcing aluminum for your raft frame and understanding its benefits, check out The Aluminum Association’s website: The Aluminum Association. This site provides extensive insights into aluminum use in various industries, including tips for DIY projects.
Steel: Strength and Considerations
Steel frames offer unmatched strength, making them suitable for rigorous rafting demands. However, the weight of steel can be a drawback, as it increases the overall mass of the raft, impacting maneuverability. Regular maintenance to prevent rust involves painting or coating the steel with a rust inhibitor. For those considering steel, it is crucial to have access to welding equipment and skills, as steel frames are typically assembled through welding.
Frame Connectors and Accessories
Types of Connectors
Choosing the right connectors is essential for assembling a sturdy and reliable diy raft frame. Here are some popular options:
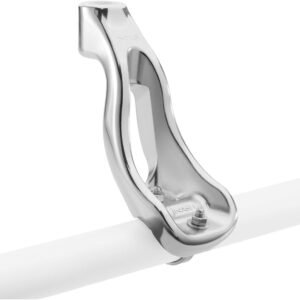
- NRS Lo Pro Fittings: Widely recognized for their reliability, these fittings are robust and easy to use, fitting standard pipe sizes perfectly.
- Revolver Outdoor Frame Clamps: These are high-end, machined aluminum clamps available in various colors, offering both aesthetics and performance.
- SRC Forged Aluminum: Known for a good balance of strength and value, these are suitable for those who need durable fittings without the high cost.
- T Clamp: These are budget-friendly but provide less strength. They are secured with a locking screw, which may not hold under high stress.
Choosing the Right Connectors for Your Needs
Consider the type of rafting you plan to do. For demanding conditions like whitewater, opt for stronger, more reliable connectors such as the NRS or Revolver clamps. For lighter, less intensive use, T Clamps may be sufficient.
Welding vs. Clamping
Comparing the Two Methods
- Welding: Offers a permanent solution and can provide a stronger, more rigid frame. Ideal for those with access to welding equipment and expertise. However, it limits the ability to disassemble the frame for transport.
- Clamping: Provides flexibility in assembly and disassembly, making it ideal for those who need to transport their raft in parts. Clamps can be adjusted or replaced easily, which is beneficial for modifications or repairs.
Factors to Consider for Each Technique
- Skill Level: Welding requires specialized skills and safety precautions, whereas clamping is more accessible to beginners.
- Portability: If you frequently transport your raft, clamping allows for breakdown and reassembly, which is less feasible with welded frames.
- Longevity and Maintenance: Welded joints typically require less maintenance than clamped connections, which may loosen over time and need tightening or replacing.
-
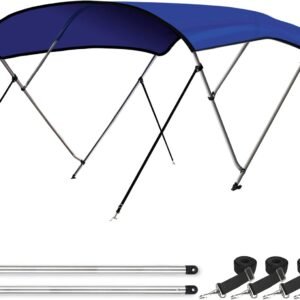
3 Bow / 4 Bow Bimini Top – Raft Sun Shade Canopy
-
Sale!
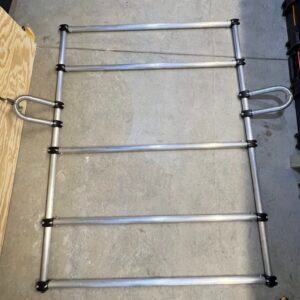
4 Bay Adjustable Raft Frame Kit
Original price was: $578.00.$521.00Current price is: $521.00. -
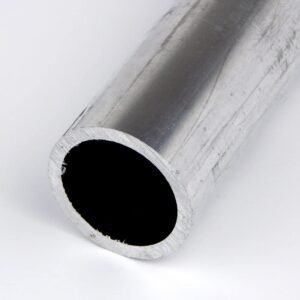
6061 Aluminum Pipe (1-1/4″ IPS, Schedule 40) – Raft Frame Tubing
-
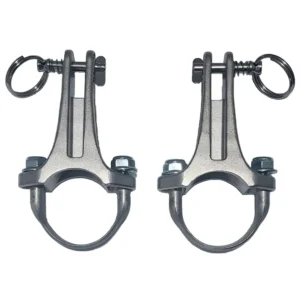
Better Mounts BM1T Tall Bimini Mount Set (1-1/4″ Frame) – Raft Frame Bimini Hardware
-

CGEAR Original Sand-Free Outdoor Mat – Raft, Camping & Beach Ground Mat
-
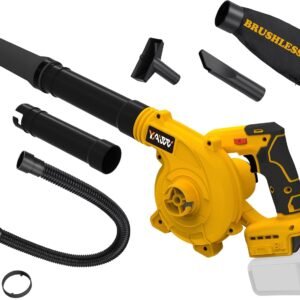
Cordless Leaf Blower for DeWalt 20V Batteries – DIY Raft Inflation & Cleanup Tool
-
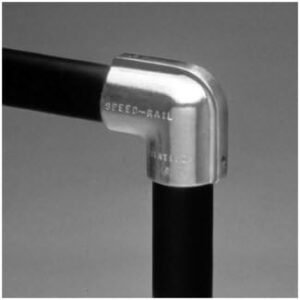
Hollaender 3-7 Elbow (1-1/4″ IPS) – Aluminum Magnesium Pipe Fitting
-
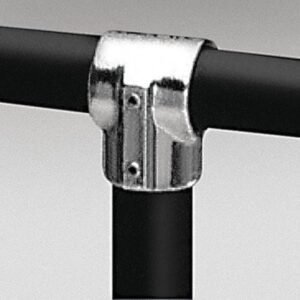
Hollaender 5E-7 Aluminum Tee Fitting (1-1/4″ IPS) for Raft Frames
-
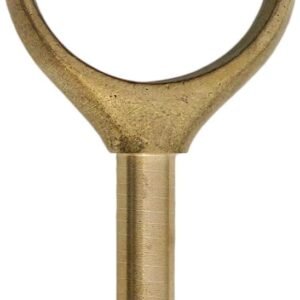
NRS 8″ Oar Mounts – Forged Aluminum Raft Frame Oar Towers
-
Sawyer Oar Locks (A-Style & Cobra Style) – Whitewater Raft Frame Oarlocks
-
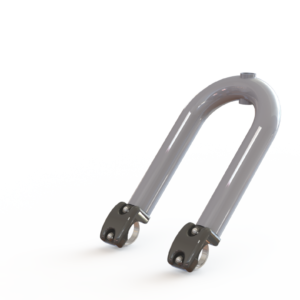
SRC Oar Towers 10 inch
$159.00 -
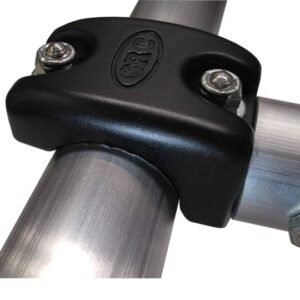
SRC Raft Frame Fittings
$34.95
Designing Your Raft Frame
Considerations Based on the Type of Boating
The type of boating you plan to engage in significantly influences the design of your raft frame. For instance:
- Fly Fishing: Frames should be stable with easy access to gear and comfortable seating for casting.
- Whitewater Rafting: Durability and secure attachment points for safety equipment are crucial.
- Leisurely Float Trips: Space for coolers and additional seating might be priorities.
Planning for Equipment and Passenger Space
Consider what you will carry on your trips—gear, coolers, dry boxes, and the number of passengers. Each item needs a designated space on the frame. Ensure there is enough room for all essentials without overcrowding, which can affect the raft’s balance and maneuverability.
Sketching and Planning
How to Sketch Out Your Frame Design
Start by drawing a rough sketch of the raft layout. Use grid paper to scale your drawing accurately, noting the placement of key components like oar locks, seating, and storage. This visual representation helps in visualizing the end product and aids in material estimation.
Calculating Materials Needed
Based on your sketch, list the lengths and quantities of materials required. Remember to account for extra material in case of errors or adjustments. Also, list the fittings, screws, and other hardware needed to complete the frame. This list will serve as your shopping guide when sourcing materials.
Sourcing Materials
Where to Find the Necessary Materials
- Wood: Local lumber yards often offer a variety of wood types suitable for outdoor use.
- Aluminum and Steel: Metal suppliers or fabrication shops can provide custom cuts and sometimes even specific treatments like anodizing for aluminum or coating for steel to enhance corrosion resistance.
- Connectors and Hardware: Specialty outdoor retailers or online suppliers specializing in rafting equipment are excellent sources for high-quality connectors and rafting accessories.
Tips for Working with Suppliers
When ordering materials, especially metals, specify the dimensions and treatments needed. Suppliers can often cut materials to size, reducing the need for you to have specialized cutting tools. Building relationships with local suppliers can also lead to discounts and valuable advice on material handling and maintenance.

Raft Frame Assembly Process
Step-by-Step Guide to Assembling Your Frame
- Layout Materials: Begin by laying out all your materials and tools. Ensure you have everything you need within reach to facilitate an efficient assembly process.
- Construct the Base: Start with the base of the frame, connecting the longer sections of material using your chosen connectors or welding points. Ensure all joints are tight and secure.
- Add Vertical Supports: Attach vertical supports where necessary, particularly if your design includes elevated seating or storage areas.
- Install Crossbeams: These will provide additional stability and mounting points for accessories such as oar locks and holders.
- Attach Accessories: Finally, add any additional accessories like seat mounts, oar towers, and hardware for attaching gear.
Testing and Making Adjustments
Once the frame is assembled, place it on your raft to check for fit and stability. Make any necessary adjustments to ensure the frame sits correctly and securely. It’s important that the frame does not shift under movement and holds all intended gear without sagging or bending.
Testing Your Raft Frame
Conducting a Test Run
After assembly, a test run on calm, flat water is crucial to evaluate the performance of your raft frame. Look for any issues in stability or functionality. This is the time to test how well your frame handles the load and distribution of weight, and to make sure there are no structural compromises.
Safety Checks and Adjustments
Inspect all connections and joints for signs of stress or potential failure. Pay special attention to welded joints and clamped areas. Any movement or loosening should be addressed immediately to ensure safety and durability. Consider adding reinforcement where needed, or adjusting the tightness and positioning of clamps.
Maintenance and Care
Tips for Maintaining Different Frame Materials
- Wood: Regularly apply waterproof sealants and check for signs of wear or water damage. Sand down any rough areas to prevent degradation.
- Aluminum: Clean with a mild soap and water solution and check periodically for any signs of corrosion, though it’s less likely with this material.
- Steel: Apply rust-preventive paint or coatings annually, and inspect for any signs of corrosion. Treat any rust spots immediately to prevent further damage.
Routine Checks and Upkeep
For all materials, ensure that all fastening hardware is tight and secure before each trip. Regularly inspect your frame for any structural issues, especially after rigorous use. Keeping your frame well-maintained will extend its lifespan and enhance your boating experience.
Conclusion
Building your own DIY raft frame offers not only a custom solution tailored to your specific boating needs but also the satisfaction of crafting something with your own hands. Whether you choose wood, aluminum, or steel, the process of planning, designing, and assembling your raft frame can be a rewarding project. With the right materials and a bit of elbow grease, you can create a durable and functional raft frame that outperforms many store-bought options, allowing you to proudly showcase your handiwork on every adventure.
For more diy raft frame ideas, check out our other article or visit https://www.mountainbuzz.com/.